A Complete Guide to Applying and Using Gel Nail Polish At Home For Salon Style Manicure

Fresh, glossy nails can instantly make you feel more put together, but salon visits aren't always convenient. An at-home manicure gives you control over the process, colors, and timing. The right gel nail polish can help bring that salon-style finish home.
All featured products are selected by our editors and may include affiliate links. If you purchase through these links, we may earn a commission.
The vibe that you get when you get fresh glossy nails is immaculate. But getting that look comes with the headache of having to go to the salon over and over again. Keeping up with appointments is a major pain especially if you want to switch up your color or style. All this just makes you wish you could get your nails done at home.
But getting a polished result takes more than brushing on color. Proper nail preparation, thin and even coats, correct curing, and careful removal are needed to create a manicure that looks neat and actually lasts longer. Thankfully, with the help of gel nail polish along with the right setup and technique, manicures at home feel far more doable. And the best part? The quality and finish is like expensive saloon appointments, if not better.
What Is Gel Nail Polish?
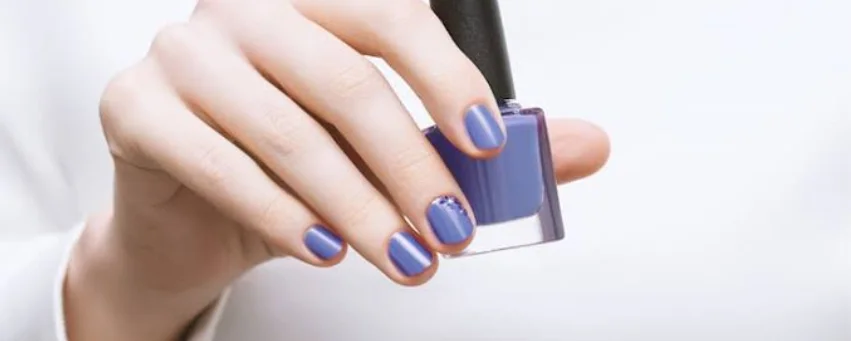
Gel nail polish is a nail color designed to cure under a UV or LED lamp instead of air-drying like traditional polish. This curing process creates a harder, glossier finish that can help the manicure last longer. Venalisa gel polish follows the usual base coat, color, and top coat system for a smooth, polished result.
Why Choose Gel Polish Over Regular Nail Polish?
Gel polish generally offers an edge over regular polish when you want longer wear, a glossier finish, quicker curing, and greater resistance to everyday chips and smudges.
How to Apply Gel Nail Polish at Home
You need to start with clean, shaped nails by gently pushing back the cuticles, removing dust and surface oils, and lightly buffing the nail when appropriate. Apply a thin layer of base coat without touching the surrounding skin, then cure it according to the product instructions. Follow with a thin layer of gel color, cure it, and add a second coat if needed for fuller coverage.
Finish with an even layer of top coat, making sure the nail is properly sealed before curing it. If the product leaves a tacky residue, follow its specific finishing instructions and clean around the nail where necessary. Keeping every layer thin is key, as thick coats can interfere with proper curing and leave the manicure uneven.
How to Remove Gel Nail Polish at Home
Removing gel nail polish carefully helps protect the natural nail underneath. Avoid peeling, scraping, or ripping the product away, as forcing it off can damage the nail surface. Follow the specific product’s removal instructions and allow soak-off formulas to soften before gently removing them. Avoid aggressive filing, then moisturize your nails and cuticles afterward.
How to Make Your At-Home Gel Manicure Last
A few simple habits can keep your at-home gel manicure glossy, neat, and durable.
-
Prepare your nails properly before applying any gel products.
-
Apply thin, even coats to prevent lifting and uneven curing.
-
Cure every layer for the recommended time using your lamp.
-
Keep gel away from surrounding skin and cuticles.
-
Seal the free edge to help prevent premature chipping.
-
Wear gloves during cleaning or prolonged contact with water.
-
Avoid using your nails as tools or picking lifted polish.
Common At-Home Gel Polish Mistakes to Avoid
Avoiding a few common mistakes can make your at-home gel manicure smoother and long lasting.
-
Avoid applying thick coats that may cure unevenly or improperly.
-
Never skip nail preparation before applying your gel products.
-
Keep gel polish away from surrounding skin and cuticles.
-
Make sure every layer receives adequate curing time.
-
Use a lamp that's compatible with your gel polish.
-
Check product compatibility before combining different gel systems.
-
Never pick, peel, or forcefully remove your gel manicure.
-
Always follow the manufacturer's application and curing instructions.
FAQs
Does Gel Nail Polish Need a UV or LED Lamp?
Yes, gel nail polish needs curing under a compatible UV or LED lamp rather than air-drying.
How Many Coats of Gel Nail Polish Should You Apply?
Apply thin coats as needed for coverage, following the specific product’s application and curing instructions.
Can You Do Gel Nails at Home?
Yes, with the right products, compatible equipment, proper technique, and careful removal.
Salon-style nails don’t have to depend on frequent appointments. With the right setup, careful technique, and suitable polish, an at-home gel manicure can deliver polished, lasting results. Venalisa offers gel polish sets across different colors and finishes, making it easier to find an option that suits your experience, preferences, and manicure style. Explore Venalisa’s gel polish sets and choose your favorite colors and finishes for your next at-home manicure.
For more at home styling tips and guides, stay tuned to CodesWodes.
Recent Blogs
-

Regal Hotels Guide: Choosing the Right Stay in Hong Kong
Discover Regal Hotels across Hong Kong and compare airport stays, city locations, rooms, dining, wellness facilities, transport access, and amenities to find a hotel that suits your itinerary and travel style
2026-10-05 11:29:00 -

Christmas Garage Door Covers From GarageBuddy That Will Have the Neighbors Looking Twice
Want Christmas garage door covers that get your home noticed? Discover four festive GarageBuddy designs worth adding to your holiday decorations.
2026-08-08 17:40:00 -
Choosing the Right Electric Toothbrush and Oral Care Products
Discover Quip oral care products, including electric toothbrushes, flossers, toothpaste, whitening options, and replacement heads. Compare popular toothbrush models and find practical tips for choosing products that fit your daily routine
2026-09-26 12:12:00 -

Trimi Review: GLP-1 Options, Pricing and Online Care
Trimi offers online weight management consultations and compounded semaglutide or tirzepatide for eligible adults. Explore its treatment options, pricing plans, provider support, delivery process, and important safety considerations before deciding whether the service fits your needs.
2026-09-25 11:24:00 -
PassFab Guide: Password Recovery, Windows Repair & Unlocking
Explore PassFab tools for Windows password recovery, system repair, file password recovery, and device unlocking, with practical tips for choosing the right solution.
2026-09-09 11:07:00